


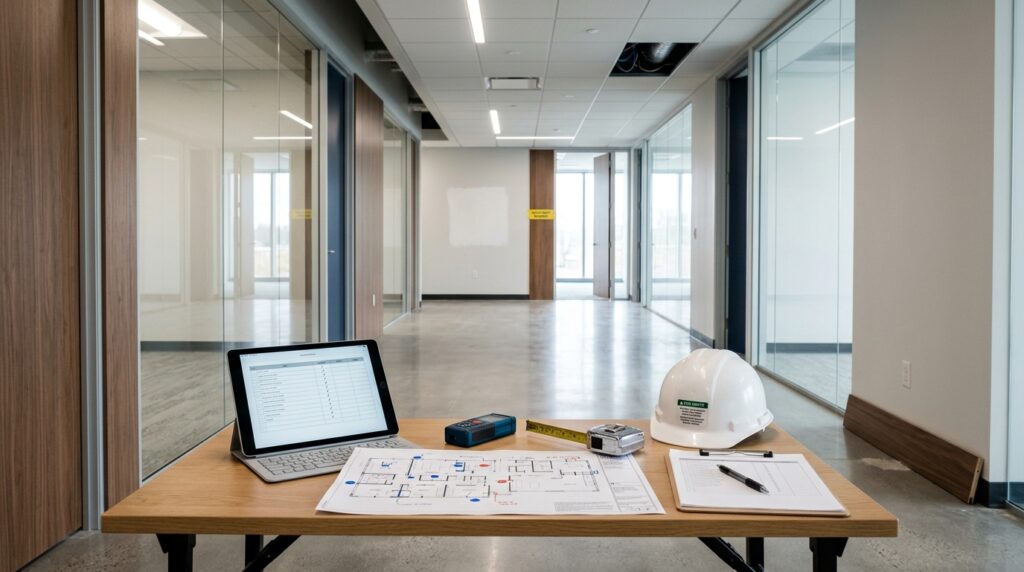
A construction inspection checklist is a structured document used by project managers, site supervisors, and safety officers to systematically verify that construction activities meet safety regulations, quality standards, and contractual specifications at every phase of a build — from groundbreaking to final walkthrough.
What Is a Construction Inspection Checklist — and Why Does It Matter in 2026?
Construction remains one of the most hazardous industries in the United States. According to the Texas Department of Insurance, Division of Workers’ Compensation, construction accidents account for approximately 20% of all work-related deaths in America each year. OSHA’s Title 29 CFR 1926.20 explicitly requires employers to perform regular inspections of jobsites, equipment, and materials to protect workers from preventable harm.
A well-designed construction inspection checklist serves two core purposes:
- It helps employers conduct effective inspections to protect workers from jobsite hazards.
- It acts as a self-audit tool to verify compliance with OSHA’s General Safety and Health Provisions.
Without a standardized checklist, critical items slip through the cracks — exposing firms to OSHA citations, project delays, and liability claims that can derail an entire project.
How Is a Construction Inspection Checklist Structured?
Most professional checklists follow a yes/no question format, allowing inspectors to quickly flag non-compliant items and record a corrective action date. As BeSmart Ireland’s Construction Site Inspection Checklist for Safety Representatives notes, the template can be completed in a single inspection or across a series of shorter inspections, and it can be adapted to suit the specific conditions of any site.
What Are the Core Sections of a Site Inspection?
A comprehensive checklist typically covers the following categories:
| Inspection Category | Key Focus Areas |
|---|---|
| General Site Management | Permits, fencing, signage, housekeeping, public safety |
| Access & Traffic Control | Vehicle routes, pedestrian separation, detour signs |
| Workers’ Safety & PPE | Hard hats, footwear, fall arrest equipment, training records |
| Scaffolding & Working at Height | CSCS-certified erection, weekly inspection records |
| Electrical Systems | 110V supply, transformer points, competent-person checks |
| Fire Safety | Alarm systems, fire/smoke dampers, sprinkler test records |
| Watermain & Pipe Installation | Pipe alignment, trench width, bedding, leakage tests |
| Structural & Quality Checks | Material approvals, concrete pours, weld inspections |
| Environmental Controls | Dust suppression, mud control, waste management |
| Documentation | Photographs, permits, as-built plans, CIR system entries |

What Are the Most Critical Items on a Construction Inspection Checklist?
1. General Site Safety
Every construction inspection starts with the basics. Inspectors must confirm:
- Yes / No: Do workers have a safe route to their place of work?
- Yes / No: Is the site fenced and secure so the public cannot gain access?
- Yes / No: Are appropriate safety signs in place for traffic routes and authorized personnel?
- Yes / No: Are welfare facilities — toilets, canteen — adequate and clean?
- Yes / No: Are first-aid facilities in place and known to all workers?
These items directly protect workers and the surrounding community. A single “no” answer on public access control, for example, can expose a project to significant liability.
2. Working at Height and Scaffolding
Falls remain the single leading cause of construction fatalities. Inspectors must verify:
- Collective fall protection measures (netting, scaffolding) are in place.
- Scaffolds are erected, altered, and dismantled by competent, CSCS-certified scaffolders.
- Scaffolds are inspected at least weekly by a competent person, with results recorded.
- Ladders and stepladders are used only for light work of short duration when no other option exists.
- Workers who cannot be protected by collective measures are using correct fall arrest or restraint equipment.
3. Fire Safety Systems
For occupied or partially occupied buildings, fire system verification is non-negotiable. The University of California, Berkeley’s Construction Inspection Checklist provides a detailed fire safety protocol that includes:
- Smoke/heat detectors — functional test
- Manual pull stations — operational check
- Fire/smoke dampers — installation, location, and differential pressure test
- Fire sprinkler system — flow switch test (Inspector’s Test)
- Horn/strobes — functional test, wiring, and labeling
- Battery test for backup power systems
- Automatic closing doors — fire alarm and loss-of-power tests
Fire system items should never be marked “n/a” without written justification from the Fire Marshal.
4. Pipe and Watermain Inspection
Underground utility work requires precise documentation. Per the Town of Ladysmith Construction Inspection Checklist, key pipe installation checks include:
- Pipe located on correct line (max. 150 mm deviation)
- Trench width within spec (min. = d + 300 mm, max. = d + 600 mm to 100 mm above pipe)
- Adequate cover — min. 1.2 m measured from top of pipe
- Correct bedding material (8 mm max. sand)
- Sufficient bedding under pipe (min. 100 mm; min. 150 mm in rock)
- Leakage tests completed and recorded
- Adequate thrust blocking and joint restraints in place
These pipe installation standards are critical for long-term infrastructure quality and to prevent costly project rework.
How Do You Conduct a Construction Site Inspection Step by Step?
Conducting a thorough inspection is a process, not a walk-through. Follow these seven steps to maximize effectiveness:
Step 1: Pre-Inspection Preparation Review the project drawings, previous inspection reports, and any outstanding corrective actions. Confirm your checklist is current and tailored to the active phase of construction.
Step 2: Verify Permits and Documentation Confirm all necessary permits are on file — construction permits, insurance certificates, bonding documents, and health certifications where required. No work should proceed without valid documentation.
Step 3: Inspect Site Access and Public Safety Walk the perimeter. Check that barricades are correctly positioned around excavations, stockpiled materials are secured, traffic routes are clear and well-lit, and vehicles have visual and reversing aids fitted where needed.
Step 4: Assess Workers’ Conditions and PPE Confirm all workers on site are wearing correct personal protective equipment. Verify that manual handling training has been provided and that lifting equipment is certified and regularly inspected.
Step 5: Inspect Structural and Mechanical Work Check quality of concrete pours, weld quality, pipe bedding, and any fire-rated assembly installations. Use yes/no responses to record findings and flag items requiring correction. The construction inspection process at this stage must be tied directly to contract specifications and applicable codes.
Step 6: Test and Commission Systems For fire alarms, sprinkler systems, HVAC dampers, and electrical systems, each functional test must be logged with the date, inspector name, and pass/fail result. Management should review all test records before sign-off.
Step 7: Document, Photograph, and Issue the Report Take photographs of all inspected areas — particularly easements and developed areas before and after work. Enter all contractor inspection requests (CIRs) into the project’s online management system. Distribute the completed report to the project manager, general contractor, and relevant authorities within 24 hours.
To streamline how your team tracks corrective actions across multiple sites, a centralized field inspection management platform gives project leads real-time visibility into open findings and closure rates.
Master Construction Inspection Checklist: Phase-by-Phase Reference
Use this consolidated checklist as your baseline across all major project phases. Adapt it to your specific scope, jurisdiction, and contract requirements.
Pre-Construction Phase
- All permits obtained and posted on site
- Site fencing and public access controls installed
- Emergency vehicle access route confirmed
- Pre-construction photographs taken in all easement and developed areas
- Utility locations identified and marked (overhead and buried electricity, gas lines)
- Traffic management plan approved and signed off
Foundation and Earthworks Phase
- Excavation barricades in place and clearly marked
- Trench dimensions within specification (min. and max. widths confirmed)
- Correct bedding material verified and documented
- Pipe laid on correct line (deviation within 150 mm)
- Adequate cover confirmed (min. 1.2 m from top of pipe)
- Leakage test completed and recorded
Structural Framing Phase
- Structural drawings reviewed and on site
- Material quality certificates on file
- Weld inspection records completed
- Fire-rated assembly installations verified (walls, shafts, horizontal exits)
- Through-penetration fire stops installed correctly
Mechanical, Electrical, and Plumbing (MEP) Phase
- Electrical systems inspected by a competent person
- 110V power supply confirmed; adequate transformer points on site
- Fire alarm initiating devices labeled, wired, and functionally tested
- Fire/smoke dampers installed, located correctly, and tested
- Sprinkler system flow switch test completed
- HVAC air balancing complete before air sampling system test
Final Inspection and Commissioning Phase
- All outstanding corrective actions from previous inspections closed
- Fire Marshal sign-off obtained
- As-built plans and voltage drop calculations submitted
- All CIRs entered and closed in the project management system
- Final photographic record completed
- Occupancy permit conditions verified
For teams that want to go deeper on pre-handover quality control, a structured final inspection workflow reduces punch list items and accelerates client acceptance.
How Should Construction Inspection Records Be Managed?
Inspection records are legal documents. Poor record management creates exposure during disputes, insurance claims, and regulatory audits. Best-practice record management requires:
- Timestamped entries: Every yes/no response must carry a date and inspector name.
- Corrective action dates: Each flagged item must include the date the hazard was corrected.
- Photographic evidence: Images linked directly to checklist line items, not stored in a separate folder.
- Version control: Checklists must reflect the current revision of applicable standards (e.g., 29 CFR 1926.20).
- Secure storage: Records retained for the duration required by your jurisdiction — typically the life of the structure for structural items.
Project management teams that centralize inspection records in a single platform eliminate the version-control problems that plague email-based workflows. To understand how leading contractors handle documentation compliance, reviewing your document retention policy against OSHA guidelines is a practical first step.
How Do You Customize a Construction Inspection Checklist for Your Project?
No two projects are identical. A checklist for a high-rise residential tower requires different line items than one for a municipal watermain replacement. Customization should account for:
- Project type: Civil infrastructure, commercial, residential, industrial, or mixed-use
- Construction phase: Pre-construction, foundation, structural, MEP, or final
- Jurisdiction: Federal OSHA standards, state-specific requirements, or local municipal codes
- Contract specifications: Owner-mandated quality standards that exceed minimum code requirements
- Site-specific hazards: Proximity to schools, hospitals, or busy roadways; underground utilities; environmental sensitivities
When building a custom checklist, start with the relevant OSHA standard (29 CFR 1926 for construction), layer in your local jurisdiction’s requirements, and then add project-specific items. For teams managing multiple concurrent projects, a scalable inspection template library ensures consistency across your entire portfolio without starting from scratch each time.

Frequently Asked Questions (FAQ)
What is the difference between a construction inspection checklist and a punch list?
A construction inspection checklist is used throughout the entire build process — at each phase — to verify ongoing compliance with safety, quality, and code requirements. A punch list, by contrast, is a final document generated at or near project completion that identifies specific deficiencies that must be corrected before the owner accepts the work. The checklist is proactive and continuous; the punch list is reactive and terminal.
How often should construction site inspections be conducted?
OSHA requires regular inspections, but frequency depends on project phase and risk level. High-hazard activities — excavation, working at height, hot work — require daily or even pre-task inspection. Scaffolding must be inspected at least weekly by a competent person. General site conditions should be reviewed at the start of each workday. Fire systems and permanent installations require inspection at specific milestones defined in the contract and applicable codes.
Can a digital construction inspection checklist replace a paper form for OSHA compliance purposes?
Yes. OSHA accepts electronic records under 29 CFR 1910.1020 and related provisions, provided the records are accurate, accessible, and can be reproduced in legible form when required. Digital platforms that timestamp entries, capture image evidence, and maintain an auditable log of corrective actions typically provide a stronger compliance record than paper forms, which are susceptible to loss, alteration, and illegibility.
Conclusion
A well-structured construction inspection checklist is no longer just a compliance requirement — it is a critical control system for managing risk, ensuring quality, and protecting both workers and project outcomes. In an industry where a single oversight can lead to delays, financial loss, or serious safety incidents, standardized inspections provide the discipline needed to maintain consistency across every phase of construction.
As projects become more complex and regulatory expectations continue to rise, relying on manual or inconsistent inspection processes is no longer sustainable. Leading construction teams are moving toward digital, real-time inspection workflows that centralize data, enforce accountability, and enable faster decision-making on-site.
Ultimately, the difference between reactive problem-solving and proactive project control comes down to visibility. With the right checklist structure, supported by modern inspection tools, teams can identify risks earlier, close gaps faster, and deliver projects that meet both safety standards and client expectations — without compromise.


